Checkpoints are specific physical locations marked with a QR code that can be scanned using the Vismo Locate & Protect app. These are typically placed at key areas such as building entrances and exits, high-risk zones, laboratories, or secure rooms. Scanning a Checkpoint allows users to log their presence at a location, helping to improve visibility, safety, and compliance across an organisation.
When a user scans a QR code at a Checkpoint using their mobile phone’s camera, this action can trigger a notification. Notifications can be sent to administrators or designated user groups for example, when someone enters or exits a secure location.
To enable this functionality, you’ll need to create a Checkpoint Event within the relevant Group’s settings.
Step-by-Step Guide: Setting Up Checkpoint Notifications
- Access Group Settings
Navigate to the Group where you want to set up the notification.
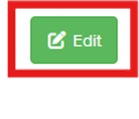
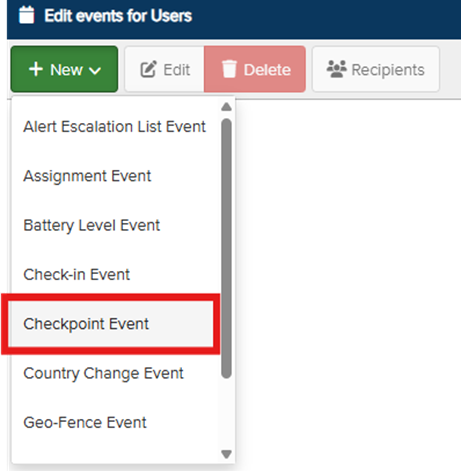
Click the ‘Edit’ button next to the Events section in the Group settings list. - Create a New Event
Select ‘New’ from the toolbar. - Select 'Checkpoint Event'
From the drop-down menu, choose ‘Checkpoint Event’.
This will open a configuration window where you can define the event criteria.
- Set the Trigger Conditions
Choose when the notification should be triggered:- When any Checkpoint is scanned
- Or only when an Entry/Exit transition is performed
- Save the Event
Click ‘Save’ in the toolbar to add the Checkpoint Event to the Group.
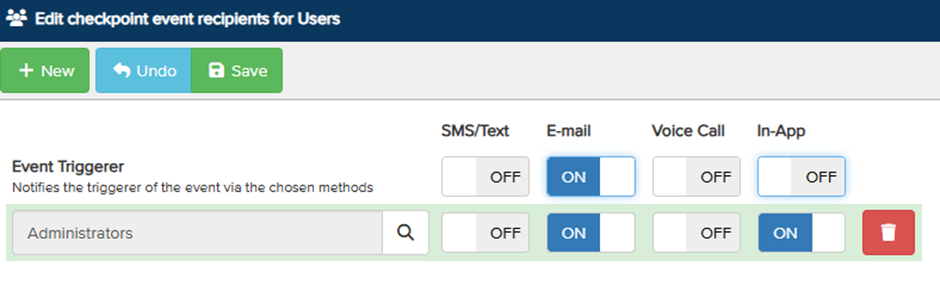
- Assign Notification Recipients
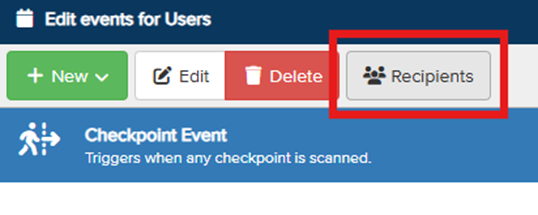
- Highlight the newly created Checkpoint Event
- Click ‘Recipients’ in the toolbar
- Configure Recipient Settings
- Select one or more user groups to receive the notification
- Choose the preferred delivery method (e.g. email, SMS, in-app message)
Optionally, you may also choose to send a message to the user who triggered the event
- Save Your Changes
Once all recipient settings have been configured, click ‘Save’.
The notification is now active and will be sent whenever the defined Checkpoint is scanned.