
Once POI layers have been set up, administrators can add these layers to the map.
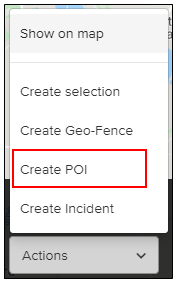
Start by searching for the location where you want to add a POI layer. The location details bar will appear. Click on Actions and select Create POI.
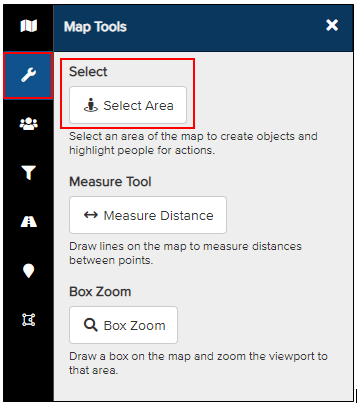
Alternatively, you can manually select your POI area. From the map dashboard, click the spanner icon in the side panel and then select Select Area. A popup will appear asking you to choose a shape to draw on the map. Note: To create a POI, you must select a Circle.
A radius will extend from the starting point of the circle as you drag the mouse outward. Click on the map where you want the circle to appear, then drag your mouse outward to adjust the radius. You can edit the shape by clicking any of the points to increase or decrease the size of the circle.
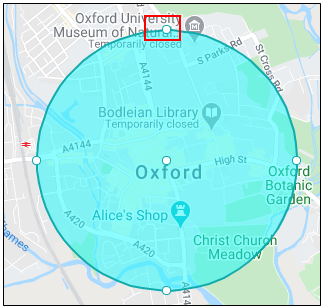
Once the area is defined, click on the circle to display the actions bar at the bottom of the screen. Click the Actions drop-down arrow and select Create POI.
A POI Layer popup will appear. Choose the type of POI layer from the drop-down menu and follow the prompts to add the desired layer.
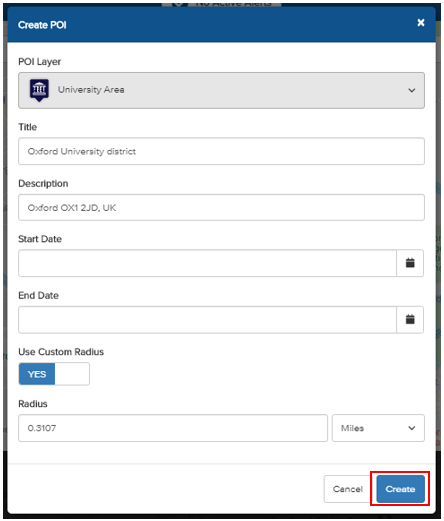
Enter a Title and Description for the POI layer.
Set a Start and End Date for the POI layer. If no dates are entered, the POI will remain on the map until it is deleted.
The Use Custom Radius option applies the radius of the circle drawn on the map. If set to No, the radius will default to the standard parameters for the selected POI layer type.
Click Create to add your POI layer.
To view your POIs, return to the map dashboard and select the relevant POI layers.