
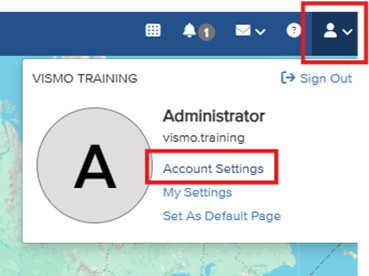
Geo-fences can be imported in bulk using the Import feature found under Account Settings > Geo-Fence Layers.
Before importing, you must either:
- Create a new layer for the geo-fences to be imported into.
- Select an existing layer to import the geo-fences into, updating its existing geo-fences.
New Layer
Go to Account Settings.
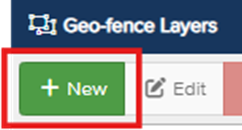
Click Geo-Fence Layers.

Click New.
- Assign the new layer a name and colour.
- Click Save.
Your new layer will now appear in the list of Geo-Fence Layers.

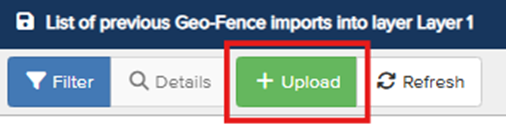
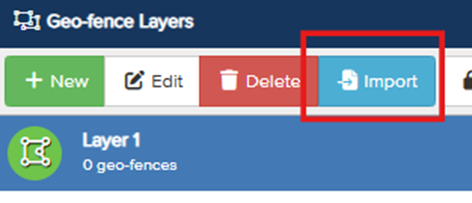
- Click your new layer to highlight it, then click Import on the toolbar.
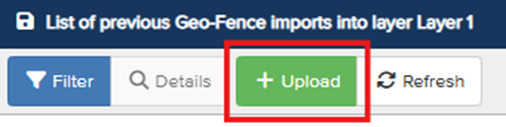
On the import screen, select Upload.
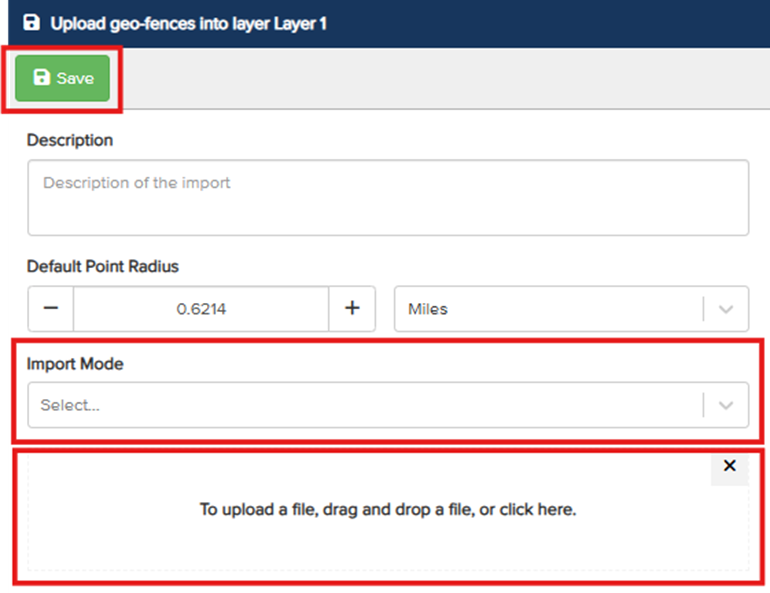
- On the upload screen, you can add a description, default point radius and choose an import mode:
- Synchronise – Updates the Geo-Fence layer so that its Geo-Fences exactly match the contents of the imported file.
Add and update – Updates the Geo-Fence layer so that any Geo-Fences defined in the file which do not exist in the layer are added, and any existing Geo-Fences are updated. No Geo-Fences are removed.
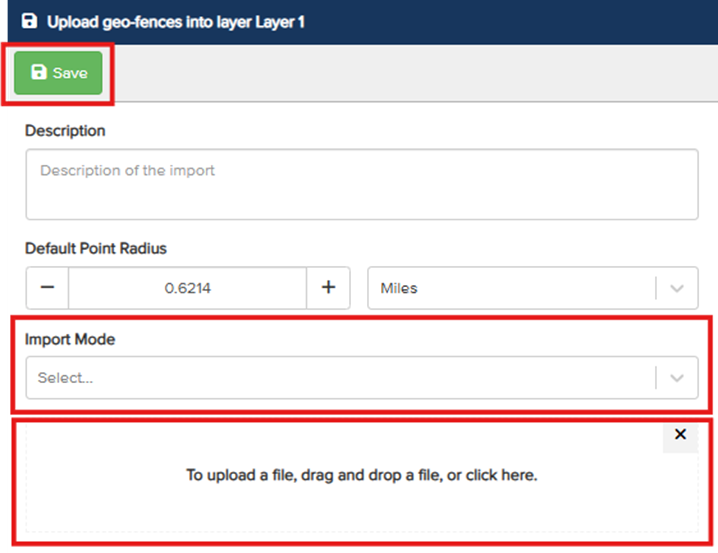
- Once the import mode is selected, drag and drop a KML file into the window.
- Click Save.
Existing Layer
Click your existing layer to highlight it, then click Import on the toolbar.
On the import screen, select Upload.
- On the upload screen, you can add a description, default point radius and choose an import mode:
- Synchronise – Updates the Geo-Fence layer so that its Geo-Fences exactly match the contents of the imported file.
Add and update – Updates the Geo-Fence layer so that any Geo-Fences defined in the file which do not exist in the layer are added, and any existing Geo-Fences are updated. No Geo-Fences are removed.
- Once the import mode is selected, drag and drop a KML file into the window.
- Click Save.
What is a KML File?
KML is a standard file format used to represent geographical data such as points, lines, and areas on a map. The easiest way to create KML files is by using the Google Earth website. This platform allows you to draw points and polygons, which can then be exported together as a single KML file. While KML supports a wide range of use cases, Vismo uses only a small subset of the format that is relevant to our system requirements.
Vismo Supported Fields
The following KML fields are supported in Vismo:
- Name - Maps to the geo-fence name or title.
- Description - Maps to the geo-fence description.
- Timespan - Optionally specifies a start (begin) and end (end) date for the geo-fence.
- Geometry - Defines the shape or location of the geo-fence.
- Both Point and Polygon types are supported.
Note: For point-radius geo-fences, a default point radius must be specified in the portal, as this is not included in the KML file. This radius will be applied to all point-radius geo-fences.
50 KB